gfe--gluten free easily
Living gluten free easily by eating real food and a few gf processed foods
MENU
SUBSCRIBE
Home
Home
Archives
About
About
Recipes
All Recipes
Most Popular
Best GF Bread
Pizza
Desserts
All Bread
Main Dishes
Appetizers, Soups, Vegetables, and Side Dishes
Breakfasts
Beverages
Most Popular
gfe Printables
Subscribe
Ehrlichiosis Took Me Down Hard … What You Need to Know
Rudi’s Happy Camper Contest and Let’s Go Camping Giveaway
Bourbon Banana Colada
4th of July BBQ Products Review and Giveaway
Bombay Potatoes and Chickpeas Tomato Curry
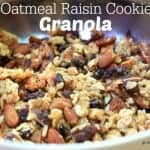
Oatmeal Raisin Cookie Granola
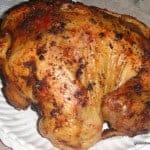
Gluten-Free Beer Can Chicken
Top Ten Posts (Plus Two) in Year One
A Canoe with a View
Until I Return …
About Those Gluten-Free Cookie S’mores
July–Go Ahead Honey, It’s Gluten Free!
![Ehrlichiosis took me down. Almost all the way down. Learn the symptoms and seek immediate medical help if you experience them. On a day-to-day basis, shower after outdoor activities during tick season. [from GlutenFreeEasily.com]](https://glutenfreeeasily.com/wp-content/uploads/2017/09/Diagnosis-Ehrlichiosis-150x150.jpg)


![While classic s'mores are very much beloved, I think you'll find a new love with these gluten-free cookie S'mores! So simple and so good! [featured on GlutenFreeEasily.com]](https://glutenfreeeasily.com/wp-content/uploads/2010/10/Almond-PB-Cookie-Smores-Above-150x150.jpg)
