gfe--gluten free easily
Living gluten free easily by eating real food and a few gf processed foods
MENU
SUBSCRIBE
Home
Home
Archives
About
About
Recipes
All Recipes
Most Popular
Best GF Bread
Pizza
Desserts
All Bread
Main Dishes
Appetizers, Soups, Vegetables, and Side Dishes
Breakfasts
Beverages
Most Popular
gfe Printables
Subscribe
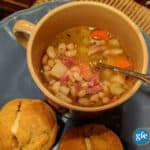
White Bean and Ham Soup (Gluten Free)
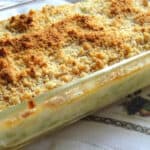
Corn and Butter Bean (or Lima Bean) Casserole
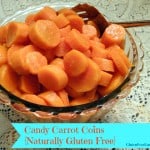
Candy Carrot Coins (Naturally Gluten Free)